Better Than Deep Trenching: The Hardware Cloth Apron Method
A horizontal hardware cloth apron placed as an L‑shaped barrier at the fenceline stops digging predators without a trench. The physics is simple: a predator that encounters wire underfoot cannot dig down past it; the wider the apron, the farther back the point of failure must be. This method spares you the labor of a 3‑foot trench while matching the exclusion rates seen in controlled wildlife barrier trials.
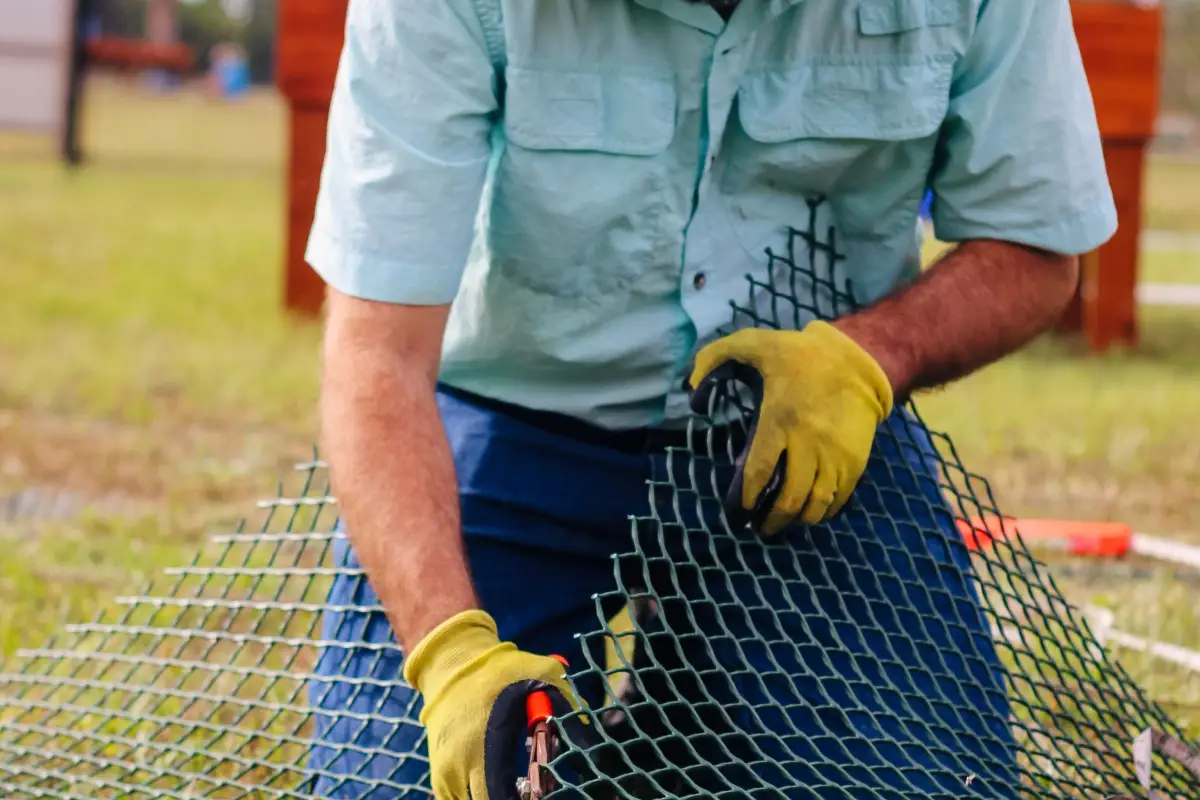
What a Completed Hardware Cloth Apron Looks Like
The finished apron is a continuous band of galvanized hardware cloth extending 12 to 18 inches horizontally outward from the fence base, pinned flat and covered with a thin layer of soil or mulch. From above, it is invisible; from beneath, a predator that attempts to dig hits the wire long before it reaches the fence line.
The Complete Checklist
- Measure the perimeter of the run and calculate the total linear feet of apron needed.
- Choose 1/2‑inch or 1/4‑inch mesh hardware cloth (19‑gauge minimum), cutting strips 18 to 24 inches wide.
- Clear vegetation and level the ground along the fenceline to create a smooth working surface.
- Position the vertical fencing panel so its bottom edge sits at or slightly below ground level.
- Unroll the hardware cloth strips and lay them perpendicular to the fence line, with one edge abutting the vertical fence at the bottom.
- Form the L‑bend by folding or positioning the cloth so the horizontal leg extends outward and the vertical leg runs a few inches up the fence.
- Secure the vertical leg to the fence with hog rings or UV‑resistant zip ties at 12‑inch intervals.
- Pin the horizontal apron to the ground using 6‑inch landscape staples, placed every 12 inches along the outer edge and in a staggered pattern across the field.
- Overlap adjacent apron sections by at least 6 inches and staple the seam closed.
- Cover the apron with 1–2 inches of soil, wood chips, or gravel to protect against UV degradation and to maintain a level walking surface.
- Inspect the entire apron for gaps, lifted edges, or exposed wire before finalizing.
Checklist Items Explained
Calculating Linear Feet and Cutting 18‑ to 24‑Inch‑Wide Strips
Measure the fenceline with a wheel or tape, then add 6 inches per section for seam overlaps. Cut strips 18 to 24 inches wide with aviation snips or a cut‑off wheel. For a 50‑foot run, plan on 15 minutes. The error to avoid: cutting strips narrower than 12 inches. That allows a predator to start digging a short distance back and tunnel under the apron before the wire blocks it.
Selecting 19‑Gauge, 1/2‑Inch Mesh Hardware Cloth
Use galvanized hardware cloth, 1/2‑inch or 1/4‑inch mesh, 19‑gauge wire. Lighter material—chicken wire, 23‑gauge mesh—fails because raccoons tear through it and thin strands rust within two seasons. 1/2‑inch mesh stops most digging mammals and is easier to work; switch to 1/4‑inch only when snake exclusion is critical. Buying a 100‑foot roll of 24‑inch‑wide cloth cuts cutting time. The most common durability failure is substituting chicken wire for hardware cloth because it is cheaper.
Clearing Vegetation and Leveling the Ground Along the Fenceline
Remove sod, rocks, and roots from a 2‑foot‑wide band outside the fence. Rake the soil until the apron will lie fully flat. Gaps under the wire—even small ones—let a skunk or rat work its snout underneath. Clearing a 50‑foot run takes about 30 minutes. Skipping this step and stapling the cloth over uneven ground is the primary reason aprons lift later and expose an edge.
Positioning the Vertical Fencing Panel at or Below Grade
Ensure the fence bottom sits at or just below the soil surface before the apron goes down. If the fence ends above the ground, a predator digs straight down and under the apron. A shallow 2‑ to 4‑inch trench for the fence panel is enough; you do not need a deep vertical barrier. The mistake here is leaving a gap between fence bottom and ground that bypasses the apron’s geometry entirely.
Laying the Apron as an Outward‑Facing L‑Shape
Unroll a strip and position it perpendicular to the fence, with one long edge against the fence base. The cloth extends horizontally outward. If it does not hold a 90‑degree fold, score a line with pliers and bend the vertical leg up a few inches. Lay all strips first so overlaps can be adjusted before fastening. A frequent error: folding the leg and then discovering the horizontal span shortened to less than 12 inches. Measure after the bend, not before.
Anchoring the Vertical Leg to the Fence with Hog Rings or UV‑Resistant Zip Ties
Attach the vertical leg to the fence mesh with hog rings (using crimping pliers) or black, UV‑resistant nylon zip ties every 12 inches. Hog rings are permanent; zip ties are faster but must be rated for outdoor exposure. Standard white zip ties degrade in one year. Expect about 5 minutes per 10‑foot section. Using interior‑grade zip ties and assuming they will last is a known short‑lived choice.
Pinning the Horizontal Apron with 6‑Inch Landscape Staples Every 12 Inches
Drive 6‑inch galvanized landscape staples through the wire into the soil. Space them 12 inches apart along the outer edge; add a few in the middle of the field to keep the cloth flat. In sandy soil, reduce spacing to 8 inches. Plan for 10 minutes per 10 linear feet. The common mistake is using 4‑inch staples—they work loose under frost heave, leaving the apron undefended.
Overlapping Seams by a Minimum of 6 Inches and Stapling Them Closed
Overlap sections by at least 6 inches and staple through both layers into the ground. This prevents a seam from opening as the soil moves seasonally. Butt joints save material but create a gap a predator can exploit in one night. Anything less than a 6‑inch overlap is the fastest route to a breach.
Covering the Apron with 1–2 Inches of Soil, Wood Chips, or Gravel
Spread a thin 1‑ to 2‑inch layer of topsoil, shredded wood chips, or pea gravel over the entire apron. The cover shields the galvanization from UV, hides the wire, and creates a walkable surface. Avoid large rocks that can pry staples loose during freeze‑thaw cycles. For a 50‑foot run, plan on 20 minutes with a wheelbarrow. Leaving the apron uncovered accelerates rust and eventually weakens the wire to the point a predator can push through.
Inspecting the Entire Apron for Gaps and Lifted Edges
Walk the perimeter and press down along the outer edge. Any spot that lifts more than an inch needs another staple. Tug each zip tie or hog ring. Look for light showing under the fence bottom. Five minutes of inspection now prevents a midnight excavation later.
Final Verification Before Letting Birds Back
- Press firmly along the outer edge: no staple should wiggle or lift the wire more than an inch.
- Pull on each fastener connecting apron to fence; replace any that fail.
- Walk the fenceline and inspect for gaps larger than 1/2 inch between apron and ground.
- Confirm the horizontal apron is fully covered with no wire exposed.
Frequently Asked Questions About the Hardware Cloth Apron Method
Can I use chicken wire instead of hardware cloth?
No. Chicken wire is thin and twisted; raccoons tear through it. Hardware cloth’s welded joints and thicker gauge are what predator‑exclusion testing has used successfully.
How long will the apron last underground?
Galvanized G90 hardware cloth typically lasts 7–10 years in soil before rust becomes structural. Covering with gravel extends service life; heavy clay shortens it.
Does the apron have to be buried?
It does not. Pinning it flat on top of the ground and covering with mulch or stone is equally effective. Burial is cosmetic and sometimes aids UV durability.
Will this stop snakes?
A 1/4‑inch mesh apron sealed tightly to the fence excludes most snakes. A 1/2‑inch mesh may allow small snakes through. For full snake exclusion, pair it with a 1/4‑inch hardware cloth perimeter up the fence.
Is the apron method effective against bears?
No. Bears can tear hardware cloth. This method is built for medium‑size digging predators—fox, raccoon, skunk, opossum—not large, powerful animals.
A properly installed hardware cloth apron gives a run near‑total exclusion against digging predators while avoiding the deep trenching labor. For a faster installation the next time, pre‑cut all the hardware cloth strips to width before breaking ground—that single change can save an hour or more on the whole project.