The Draft-Free Coop Mistake That Costs You Winter Eggs
Sealing a chicken coop tight against winter drafts is a reliable way to increase frostbite and shut down egg production. The physics is straightforward: warm air holds more moisture. When you stop all airflow, humidity from breath, droppings, and waterers climbs until it condenses on cold surfaces — and that condensation freezes on combs, wattles, and toes. The fix is a controlled ventilation system coupled with a deep litter floor that composts. Manage moisture, not drafts, and winter eggs keep coming.
What a Healthy Winter Coop Looks Like
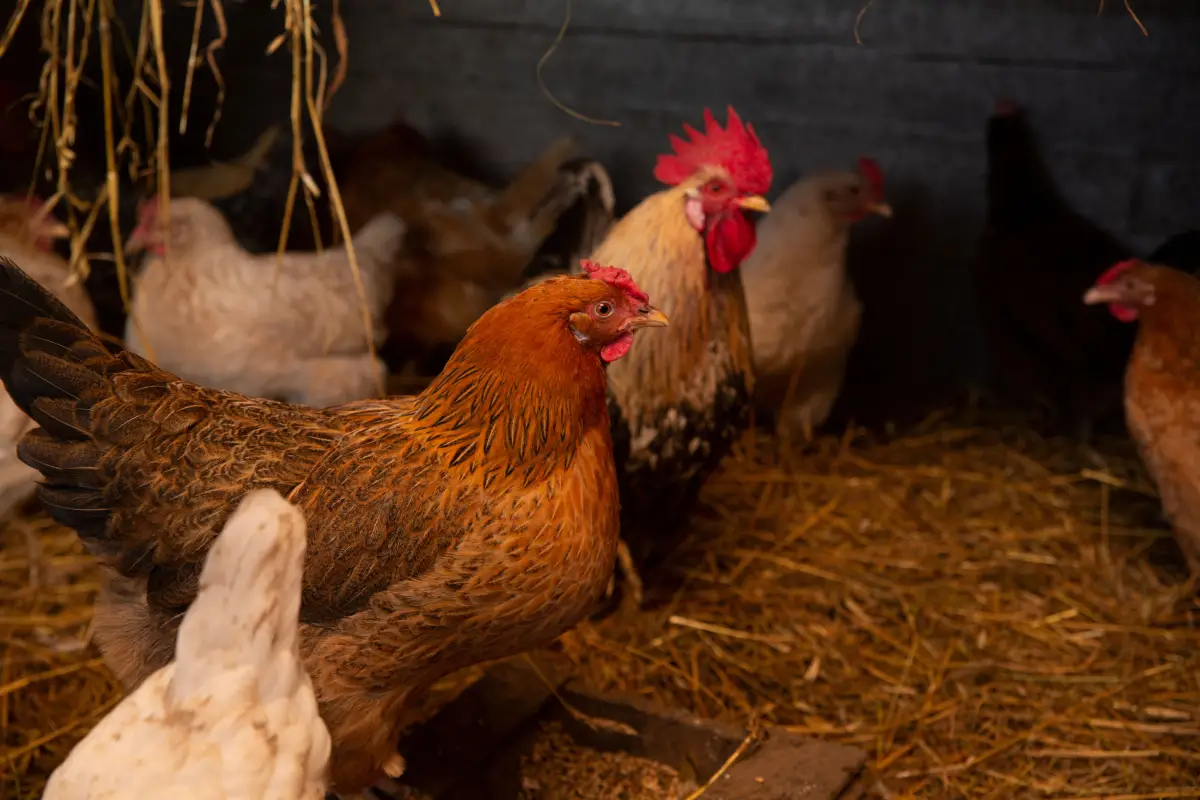
A properly set‑up coop feels cool but the air is dry. Fresh air enters near the floor, rises as it warms, picks up moisture, then exits under the roof peak — pulling humidity out without subjecting the birds to wind chill. The deep litter floor, when working, releases a steady, low warmth that keeps the flock comfortable with zero electrical input.
How to Build a Draft‑Free, Moisture‑Managed Coop — Step by Step
- Install adjustable low‑level inlet vents on the south or east wall
- Add ridge‑level exhaust openings with baffles or wind‑protected caps
- Calculate total ventilation area at roughly 1 square foot per 10 birds (adjust for your local winter climate)
- Seal only the drafts that hit the roost directly — any cracks above perch level must be closed
- Build a deep litter base with carbon‑rich bedding (wood shavings or straw) at least 6–8 inches deep
- Turn and add fresh bedding weekly to keep aerobic decomposition active
- Monitor coop humidity with a hygrometer; aim for 50–70% relative humidity
- Provide roosts wide enough for hens to cover their feet fully with body feathers
- Check for condensation on windows or roof each morning
- Keep waterers outside or use a nipple system to reduce spills
Position Fresh Air Inlets Near the Floor
Cut or open low vents on the south or east wall that catches morning sun and avoids prevailing winter winds. Fit adjustable flaps or sliding panels so the opening can be tuned. Inlets sit below the roost line so cold incoming air never blows on sleeping birds.
Installation takes under an hour per vent. The consistent error is making the inlet too small out of fear of cold — an undersized opening forces air to rush through as a targeted jet, chilling one spot while leaving the rest of the coop stagnant.
Create a High‑Volume Exhaust Path at the Ridge
Warm, humid air must leave at the roof’s highest point. Install a continuous ridge vent or a series of capped openings. Baffle or cowl them to block rain and snow, and use the Venturi effect so wind sweeping over the roof pulls air out rather than pushing cold in.
Fitting a ridge vent typically takes a couple of hours. The failure to avoid is making the exhaust opening smaller than the combined inlet area. A tight exit chokes the whole system, and humidity rises regardless of how many low vents you have.
Size Ventilation for Your Flock Size and Climate
One square foot of total ventilation opening per 10 adult hens works for moderate winter zones. Colder regions can drop slightly, but never below 0.5 square feet per 10 birds; more humid regions go higher. The target is a complete air exchange several times an hour with no noticeable wind speed at bird level.
Calculation takes minutes with a tape measure. The blunder is copying a ventilation number from a dry, warm climate and expecting it to hold in a cold, damp one — moisture transport changes with outside temperature and humidity, so the figure must be re‑sized.
Seal Drafts Only Above the Perch
Use an incense stick or thread to trace air movement on a cold day. Any current hitting the roost directly gets blocked. Cracks up near ceilings or in eaves can often remain open because they become part of the exhaust path. Sealing at roost height stops convective chilling of the birds while keeping escape routes for stale air.
This check takes about 15 minutes. The classic misstep is closing every gap you find without distinction — that turns the coop into a sealed box that traps moisture.
Start a Deep Litter Floor That Composts
Spread 6–8 inches of carbon‑heavy material like pine shavings, chopped straw, or dry leaves. Toss a handful of scratch grains on top daily to prompt the hens to turn the litter. Fresh manure and moisture drop in, the carbon absorbs them, and aerobic microbes begin breaking everything down, releasing steady, low heat. The smell should be earthy, never sharp with ammonia.
Building the base takes about 30 minutes for a typical backyard coop. The go‑wrong is using hay instead of straw — hay holds too much moisture, molds fast, and throws off the carbon‑to‑nitrogen ratio necessary for composting.
Maintain the Litter Pack Weekly
Fluff the top few inches with a fork or let the birds do the scratching. If the surface is damp or smells sour, add 1–2 inches of dry bedding. Never allow the pack to compact and become wet — that kills aerobic bacteria and shifts the process to anaerobic putrefaction, which generates ammonia and pathogens.
Weekly maintenance runs 10–15 minutes. The widespread mistake is sprinkling a thin dusting of bedding on top without breaking up the wet spots underneath; that hides a rotting core while the problem worsens.
Use a Hygrometer to Track Humidity
Place an inexpensive digital hygrometer at roost height and read it in the morning before opening doors. Relative humidity should stay between 50% and 70%. Below 50%, air becomes too dry for respiratory comfort; above 70%, condensation starts on cold surfaces, and frostbite risk jumps.
Setup takes seconds. The common oversight is hanging the meter near a vent or door, where it reads drier than the air the birds actually breathe — position it exactly where the hens sleep.
Offer Roosts That Allow Full Feather Coverage
Roosts should be wide enough — a 2×4 laid flat or a natural branch 2–3 inches thick — so that when a hen settles, her body feathers completely encase her feet. Narrow perches force toes to curl around the edge, leaving exposed skin vulnerable to frostbite even in dry air.
Installing proper roosts takes under an hour. The persistent error is using thin dowel rods or poles because they seem easy to clean; those are a direct cause of cold‑injured feet.
Inspect for Condensation Every Morning
Check the inside of windows, the ceiling underside, and corners near vents at first light. Any beading water, fog, or frost signals that ventilation is not pulling enough moisture. Adjust by opening inlets wider or clearing obstructions in the exhaust path.
This check takes two minutes. The mistake is ignoring a small patch of condensation as trivial — that patch proves the relative humidity at that surface hit 100%, and the same air surrounds combs and wattles all night.
Manage Drinking Water Away From the Litter
Put waterers outside in a covered run, or use nipple drinkers inside that release only what the bird pecks. Open bowls inside the coop dump moisture into the air and the litter, undermining everything the ventilation and deep litter are working to achieve.
Switching to nipple drinkers or moving water outside takes less than an hour. The frequent slip is leaving a traditional waterer inside because “it’s too cold for the hens to go out” — chickens will walk out to drink in all but extreme weather, and that short exposure is far less damaging than persistent high humidity indoors.
Morning Coop Check: Signs Your System Is Working
- Windows and roof are dry — no fog, no frost
- Litter smells like a forest floor, not ammonia
- Combs and wattles are bright red, dry, and unfrozen
- No accumulation of frost on feathers near vent openings
- Hens are active, eating, and laying expectably for the breed and day length
Dry Hens, Steady Eggs: Keeping the System Going
With passive ventilation and an active deep litter floor, the coop manages its own moisture even when outside temperatures drop well below freezing. The flock stays healthy, frostbite becomes rare, and winter egg production continues. For next season, start the deep litter pack in early fall when the ground is still warm — that way the microbes are already working when the first hard freeze hits.
Common Questions About Winter Coop Ventilation and Deep Litter
Does opening vents make the coop too cold?
A properly designed ventilation system exchanges air without creating a draft at bird level. The slight drop in still‑air temperature is a worthwhile trade‑off for eliminating the humidity that causes frostbite. Dry cold is far less dangerous than damp cold.
How deep should deep litter really be?
Begin with 6–8 inches and allow it to build to 12 inches or more through winter before cleaning out in spring. The composting action needs that depth to generate enough heat and to absorb moisture without becoming saturated.
Can I use hay for the deep litter floor?
Hay is a poor material — it retains too much moisture and molds quickly. Choose straw, wood shavings, or dry leaves that are high in carbon and low in nitrogen.
What temperature is actually too cold for chickens?
Healthy, dry chickens with full feather coverage withstand temperatures well below 0°F as long as they are out of direct wind and in a dry environment. Cold is not the primary danger; dampness and drafts are.
How do I know if my coop has too much moisture?
The most reliable indicators are condensation on windows or roof at morning, an ammonia smell, or a hygrometer reading consistently above 70% relative humidity at roost height.
Will the deep litter method attract rodents?
A properly managed deep litter pack that stays turned and aerobic does not attract rodents any more than any other coop bedding. Rodents are drawn to spilled feed, not compost. Secure feed in metal bins.