Backyard Chicken Run Standards That County Extension Agents Swear By
A chicken run that actually works in wet weather, under predator pressure, and through the daily grind of chores is not a fence around dirt. County extension agents who see the same failures year after year repeat a core set of standards: a minimum of 10 square feet per standard bird, an outward-facing 12-inch hardware cloth apron, a drainage layer that sheds water before it pools, and an access route that does not make egg collection feel like a penalty. What they will not tell you—because no single handout captures it—is that these standards have to work as a system, not a checklist. A run sized right but built over a clay bowl still floods. A perfectly drained run with a missing skirt still loses birds in one night. This article lays out a systems-thinking design process that connects space, predator psychology, drainage, and daily management into one reliable sequence.
The Four Systems a Run Has to Get Right at the Same Time
Every run that stays sound through multiple seasons gets four things right simultaneously. Understand these first, because the rest of the article organizes them in a specific order for a reason.
Flock Movement and Space. A square footage number alone does not tell you whether a hen can dust-bathe without being pecked, or whether a low-ranking bird can move away from the rooster. Shape and area together determine whether the run supports natural behavior or suppresses it.
Predator Psychology. A raccoon does not stop at the fence. It works the perimeter looking for a gap, a weak point, a spot where claws can hook and pull. Relying on a single barrier is a gamble. The standard is layered resistance that makes failure of any one part survivable.
Water and Waste under Foot. Manure, spilled water, and rainfall accumulate in a run at rates that surprise most new keepers. The floor is either a drainage structure or it turns into a wet, ammonia-charged mat that breeds pathogens and sickens birds.
Daily Workflow. A feeder placed where you cannot reach it without crawling through a low door will not get refilled on a cold, dark morning. The layout has to map to the keeper’s routine, or the biosecurity and cleaning that protect the flock get skipped.
The Four-Stage Sequence That Prevents the Most Common Run Failures
The framework follows a strict order because each stage sets conditions for the next. Changing the sequence—deciding on fence materials before you know the final footprint, for example—is how avoidable problems get locked into the build.
Stage 1: Determine Footprint and Shape from Flock Behavior, Not from Fence Inventory
Start with the number and breed of birds, and the amount of time they will spend in the run. The 10-square-foot minimum is a floor, not a target. Ten square feet per bird works when the flock free-ranges several hours a day. A flock confined to the run full-time needs closer to 15 square feet per bird to keep stress hormones low and pecking order conflicts manageable. Shape matters: a square run distributes space in a way that gives subordinate birds escape routes; a long, narrow run creates dead-end corners that amplify aggression.
Done correctly, this stage produces a footprint that the birds actually use—scratching along the edges, dust-bathing by the wall, and moving without constant conflict—before a single post is set.
Stage 2: Build Predator Resistance in Layers So One Failure Is Not a Catastrophe
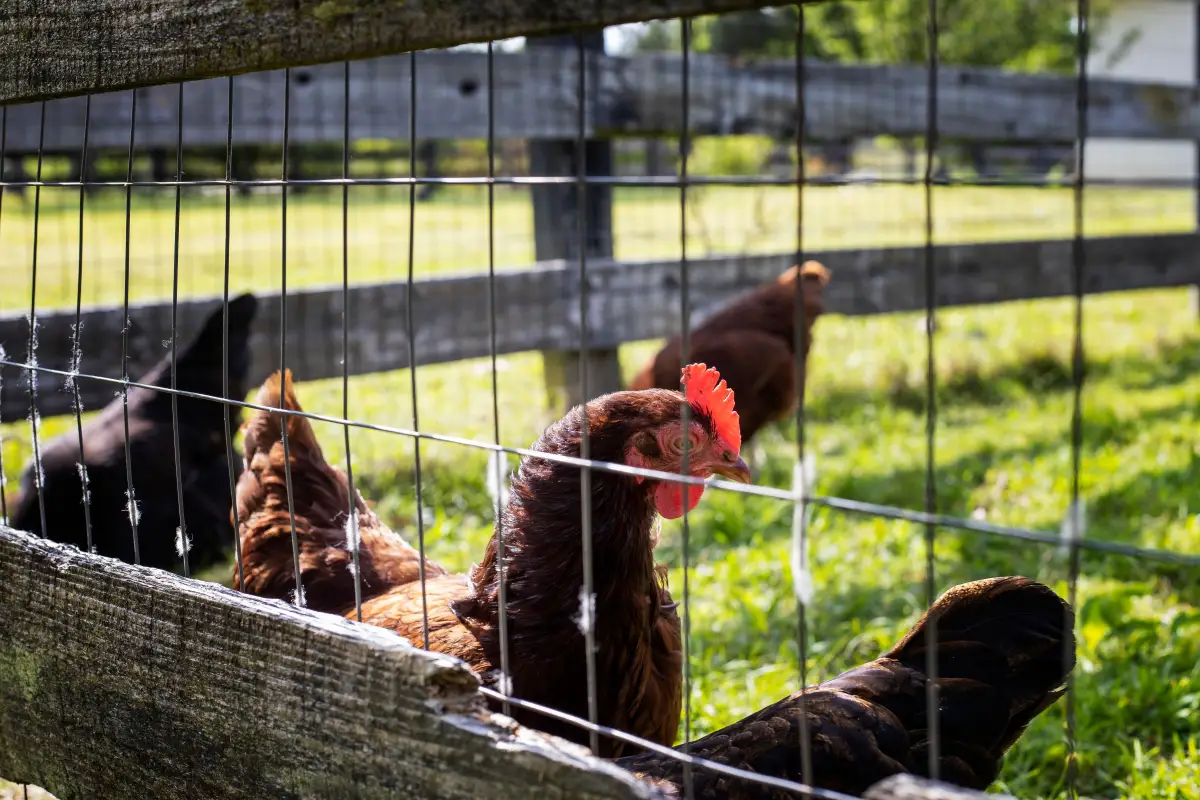
Predator protection is a series of independent barriers, each designed to stop a different method of entry. The fence barrier uses ½-inch hardware cloth, not chicken wire, which a raccoon can rip and a weasel can pass through. Fasten it with screws and fender washers; staples pull out under sustained pressure. The digging barrier is an outward-facing horizontal apron of the same hardware cloth, 12 inches wide, pinned flat to the ground with landscape staples or buried just under the sod. The overhead barrier—a solid metal roof or heavy-duty net—denies access to hawks, owls, and climbing animals that can breach a wire top.
A run defense is done well when the compromise of one layer does not open the run. A corner where the apron got lifted still leaves a vertical wall of hardware cloth that buys hours of additional time against a digging predator.
Stage 3: Grade and Layer the Run Floor to Move Water Out and Manage Manure In Place
The floor is where most runs fail silently until the problem is advanced. The task is to drain water away from the coop and keep the surface dry enough that manure dries quickly rather than turning anaerobic. Install a base of ¾-inch angular gravel at least 4 inches deep, graded at a 2% slope away from the coop entrance. On top, add 4 to 6 inches of coarse sand or a sand-and-wood-chip mix screened to remove fines. The sand forms clumps around droppings that can be sifted out; the gravel layer below prevents groundwater from wicking upward.
A floor engineered this way remains walkable through a week of steady rain, releases minimal ammonia, and cuts down fly breeding because there is no standing moisture for larvae.
Stage 4: Align the Physical Layout of the Run with the Daily Routine of the Keeper
The final stage accounts for human effort. Place the feeder and waterer within an arm’s reach of a walk-in door that clears a full-height adult without stooping. Position nest boxes so egg collection happens from outside the run, through an exterior access hatch built into the coop wall. If the run uses a deep sand system, keep a sifting scoop and a bucket on a small station near the door to make a 10-minute cleaning pass feasible on a weeknight.
Done well, this stage removes the friction that causes skipped chores. A keeper who walks out, fills the water, collects eggs, and sifts the sand in 15 minutes without crouching is a keeper who does it consistently. That consistency is what keeps a small health problem from becoming a whole-flock loss.
Applied Framework: Six Hens on Heavy Clay with Raccoon Pressure
A household with six standard hens on a suburban quarter-acre lot, clay soil, and a trail camera that confirms three raccoon visits per week applies the sequence as follows.
Stage 1: Because the flock does not free-range during the workweek, they size the run at 10 feet by 12 feet—120 square feet, giving 20 square feet per bird. The extra space compensates for the dense clay, which supports fewer ground insects and less natural scratching opportunity. A square shape allows shade panels on two sides without creating choke points.
Stage 2: They build a frame of pressure-treated lumber and wrap it in ½-inch hardware cloth, secured with screws and washers. The apron extends 12 inches outward on all sides, stapled flat and pinned every 8 inches. A corrugated metal roof panel, sloped 4 inches over the 10-foot side, sheds rain and blocks hawk dive paths.
Stage 3: Inside the footprint, they excavate 6 inches of topsoil, lay a geotextile fabric to separate soil from gravel, and spread a 4-inch layer of washed ¾-inch angular gravel. The gravel surface is shaped to a continuous 2% grade draining toward the low corner away from the coop. On top, 5 inches of coarse sand sit flush with the surrounding grade, but the gravel base keeps subsurface water moving.
Stage 4: A 32-inch-wide door opens from the patio side at full standing height. Inside, the hanging feeder and nipple drinker are mounted 24 inches from the door on a removable rail, so they can be lifted out for cleaning. Nest boxes in the coop face the exterior, accessible from a covered lid that requires no entry to the run.
After a winter of 12 inches of rainfall in 90 days, the run floor has no standing water, no odor detectable from the house, and zero predator breaches despite repeated digging at two corners. The chore routine takes 12 minutes in the morning and 10 minutes on weekend sifting.
How the Sequence Gets Broken—and What It Costs
Building the Fence Before Settling the Footprint Leads to a Permanent Size Constraint
When the perimeter is set by how much hardware cloth is on hand, the run frequently ends up undersized or awkwardly shaped. The fix after the fact—adding space—requires tearing out an entire wall. The cost is a crowded run that triggers feather picking, depressed egg production, and a flock that the keeper gradually loses interest in because the space feels stressful even to stand inside.
Omitting the Drainage Layer Because the Run Looks Fine in Dry Weather
The run that sits on bare scraped soil in July will be a mud pit by November. The cost is not just mess: wet feet soften the keratin in pads and toe scales, opening the door to bumblefoot staph infections that require antibiotics and bandaging to resolve. Ammonia from urine mixed with wet manure stresses respiratory systems, raising the flock’s susceptibility to every respiratory pathogen in the environment.
Treating the Predator Apron as a “Maybe” Because the Fence Seems Solid
A raccoon that cannot go through will go under. Without an outward apron, soft soil lets an animal dig a tunnel 12 inches deep and wide enough to slip through in less than 20 minutes. The cost is losing every bird in the coop in a single night. The apron material costs less than the replacement value of a single laying hen raised to point of lay.
Quick Reference
| Stage | Goal | Key Action |
|---|---|---|
| Footprint and Shape | Prevent crowding and support natural movement patterns | Mark at least 10 sq ft per bird, favoring a square or broad rectangle over a narrow strip |
| Predator Resistance Layers | Make entry too costly for a predator to persist | Install ½-inch hardware cloth on walls and an outward 12-inch horizontal apron pinned flush with the ground |
| Run Floor Drainage | Keep the surface dry and manure processing passive | Build a 4-inch graded gravel base topped with 4–6 inches of coarse sand, sloped away from the coop |
| Daily Chore Alignment | Reduce the friction that causes skipped care | Place feeders, waterers, and nest box access within reach of a full-height walk-in door |
FAQ
How much run space do four standard chickens need?
Forty square feet into a run they use part of the day; 60 square feet if they are confined there full-time. Bantams can manage with slightly less, heavy breeds may need marginally more, but 10 square feet per bird is the minimum safe baseline that prevents stress-driven picking and disease.
What material should I put on the floor of a chicken run?
A two-layer system: a compacted base of ¾-inch angular gravel for drainage, topped with coarse sand. The gravel prevents mud and wicks moisture downward; the sand clumps manure for easy removal and stays dry on the surface. Straight dirt compacts and becomes anaerobic within weeks under a full flock load.
How do I stop raccoons from digging under the run?
Add a 12-inch horizontal hardware cloth apron around the outside base of the run, pinned flush with the soil. It does not need to be buried deeply—just below the sod line is sufficient—because the animal digs at the fence line and hits wire where it expects soft earth.
Do I need a roof on my chicken run?
If you have hawks, owls, or raccoons that climb, a solid or netted roof is the only reliable barrier. Even without aerial predators, a roof keeps wild bird droppings out and reduces the pathogen load inside the run.
Can a chicken run be placed on an incline?
Yes, but the grade must carry water out of the run, not channel it into the coop. On slopes steeper than about 5%, terracing the gravel base or installing a short retaining wall prevents the sand layer from washing away in heavy rain.
Get the Drainage Right First, Then Build the Rest
The Habitat Loop works when you follow the order: size, predator layers, floor drainage, human routing. If you are starting today, begin with Stage 3—the floor. Sort out where water will go before a single post goes in. That one decision eliminates the source of most long-term problems that drive keepers to call for help.